
Writing a Cross-Platform, Remote Logging Console in C++
February 12, 2017
I recently finished a small side project. As the title suggests, I made a debug log console that is cross-platform and remotely connects to games.
I had two main goals. First, I believe debugging tools for games should primarily be external. They shouldn’t be in-game overlays. A side project gives me an excuse to write this blog post to claim why. Second, there were a few open source libraries I wanted to learn more about. A side project is a great way to do so.
This post is kind of a project journal. It’s not a technical deep dive. I dipped my toes into a few waters for the first time. I learned a few things and maybe you can too.
TL;DR
I wrote a remote logging console in C++. It runs on Windows, Mac, and Linux. One console can connect to multiple games running on multiple platforms at the same time.
Source Code: GitHub

Internal vs External
Before talking about my external console I want to talk about common internal tools.
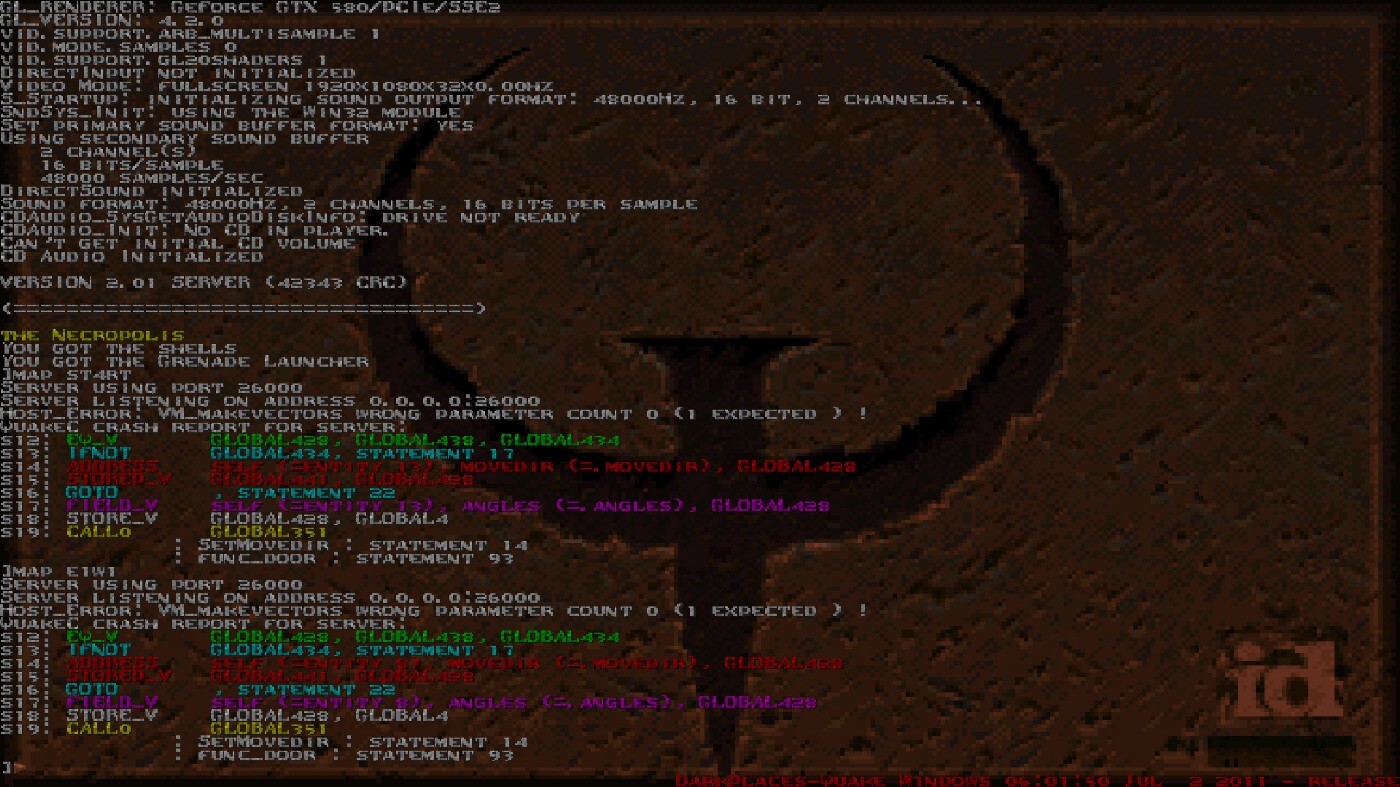
Quake has the prototypical example of an in-game console. It is opened by tapping the tilde key. It’s super fast for both reading log messages and inputting console commands.
Another type of developer tool is the real-time performance overlay. They show frame rate, memory usage, CPU profiler, etc. These overlays can spiral out of control. Here’s a picture of Starcraft 2’s in-game developer tools.
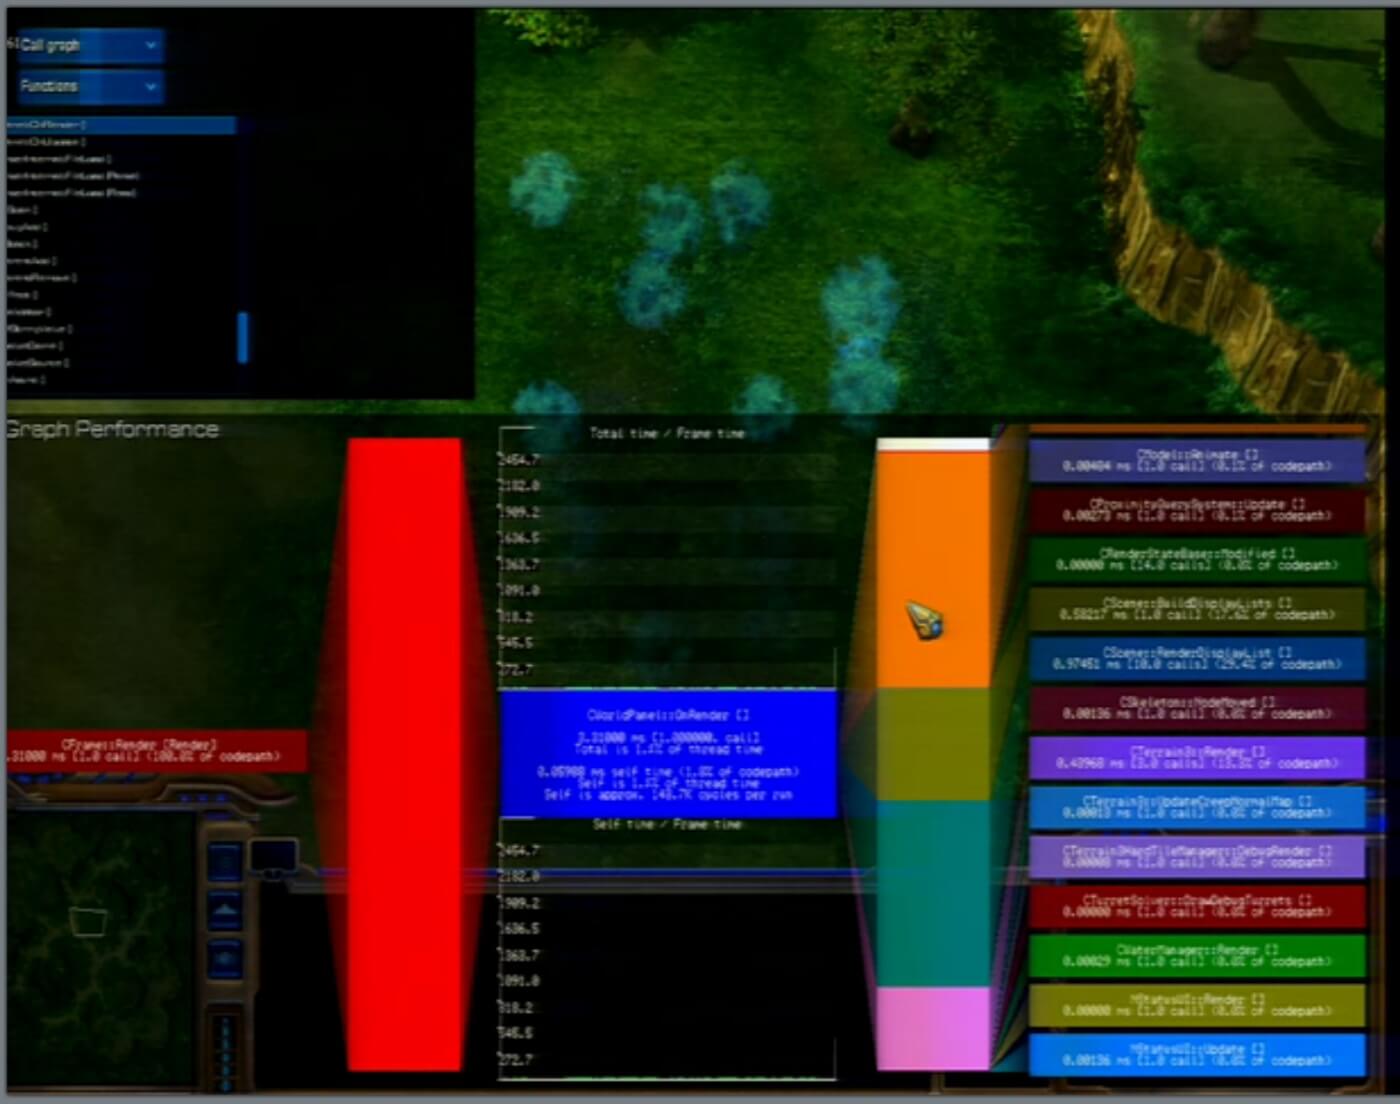
Designing for Performance, Scalability & Reliability: StarCraft II’s Approach
If you look closely you might notice a video game in the background. It’s completely obscured by gaudy debug visualizations. There are several more panels which developers can switch between. I’ll bet $5 you switch by entering obscure, undocumented keyboard shortcuts.
My belief is that these visualizers are superior when they exist in external tools. And that every game reaches a point where developers really, really wish they had remote access to this treasure trove of information.
External tools offer an obvious advantage for headless servers, multiplayer games, and non-PC platforms (Playstation, Xbox, mobile, etc). If you like to see both your game and your telemetry at the same time it’s even better for local PC development. Dual monitors have been a thing for quite awhile now.
There’s clearly value in hacking a debug panel over gameplay. It’s fast and easy. Especially with great libraries like ImGui. But remote tools provide so many advantages I’m inevitably frustrated when tools only exists in-game.
Design Requirements
Now let’s move on to my side project. I had several initial requirements.
- One console should be able to connect to multiple games.
- Multiple consoles should be able to connect to the same game.
- Games should broadcast their presence for easy discoverability.
- Two-way communication; game-to-console and console-to-game.
- Console should run on Windows, Mac, and Linux.
- Consoles and games can run on different platforms and still connect.
- Write everything in C++
Most of these points focus on ease of use. Limiting connections or having to open a multiple windows is unnecessary pain.
The C++ requirement is strictly for educational purposes. I’m a game developer which, for better or worse, is a C++ world. I would not necessarily recommend C++ for tools.
Technologies Used
These are some of the tools or technologies that were used in the final product. In some cases I tried several different options. Often times to great frustration. I’ll go into more detail for each of these below.
- ASIO — networking
- Flatbuffers — network protocol
- ImGui — user interface
- GENie — project generation
- Travis / Appveyor — continuous integration
- VMPlayer — Linux virtual machine
Networking
It turns out that cross-platform networking in C++ is pretty hard! Well, that’s not quite true. Let me rephrase. There aren’t many cross-platform libraries. The ones that do exist almost all suck.
I asked folks on Twitter what they used. The answer was almost universally “roll your own wrapper with the bare minimum number of features you need”. Blech!
Here’s a great StackOverflow post with a list of libraries. I tried several.
ZeroMQ
Uses LGPL license. GPL and LGPL code is incompatible with my eyeballs.
libuv
I should know better than to try something that is made for node.js. That’s on me really.
Poor documentation. Very poor examples. No explanation of object lifetime or memory ownership. Lots of allocations. Painful all around.
nanomsg
Successor to ZeroMQ with an MIT license.
I like nanomsg quite a lot. It has a beautiful, elegant C interface. It’s very easy to use. I had a partial implementation working.
Unfortunately it isn’t the right fit for my needs. Nanomsg implements a handful of “scalability protocols”. I want UDP broadcast for discoverability which is, unfortunately, not among them.
ASIO
ASIO is what my project uses. I partially chose ASIO because the C++17 Networking TS is based on it. It feels useful to get a preview of things to come.
To be honest, I kind of hate ASIO. It’s typical C++ bullshit. The code you are induced to write is ugly and hard to read. The underlying source code is inscrutable template crap. It breaks intellisense.
But it works. It’s stable. And it’s easy to integrate. Hrmph.
POCO
I briefly investigated POCO. It shows promise. With a working ASIO implementation I can’t justify the time to implement POCO. Maybe someday down the road.
POCO is a pretty big collection of libraries. I only need a couple. Ripping out the parts I want and getting it to compile is a process.
Cross-platform code is a solved problem. All I should have to do is provide a few defines, compile every file, and link the necessary libraries. Voila! Alas most libraries over complicate things and force you to tediously deduce which files need to be compiled on which platforms. Or, even worse, they have a ./configure step which generates code per platform. Urgh.
Protocol
With a working network library I next need a flexible protocol for serializing network messages.
Protocol Buffers
Google’s protobuf library is widely used, thoroughly tested, and well proven. So of course I chose something else.
I’ve worked with protobuf before. On Planetary Annihilation we even wrote our own version called Uberproto which was customized to our unique requirements. Because learning new things is a major goal for this side project I elected to try something new.
To be honest protobuf is what I should have used.
Synchronous
A successor to protobuf written by the same person. Performs zero copies which is all the rage these days.
Unfortunately it treats Windows as a second class citizen. A few years ago it didn’t support Windows at all. Today it only supports a “lite mode” on Windows. Bah hum bug!
Flatbuffers
Flatbuffers is what my project uses. Flatbuffers is another serialization library from Google. It’s similar to protobuf but written for games with an emphasis on speed. That sounds good!
It’s not intended for network messsages. I’m pretty sure malformed messages can cause a crash due to lack of bounds checking. I don’t think I build messages efficiently. I smooshed a square-peg through a round-hole. Which technically works but is inadvisable. In the spirit of learning new things I have no regrets.
Graphical User Interface
For the GUI I only ever intended to use ImGui. It’s something I’ve wanted to play with for awhile.
My impression of ImGui is mostly positive. It’s very lightweight and easy integrate. It has many different widgets ready to use out of the box. The examples are fantastic.
I found it very difficult to lay things out the way I wanted. It lacks built-in support for advanced features such as tabs or docking. Unfortunately it also lacks a formal way for third party extensions, plugins, or classes to be added.
ImGui is built to allow for easy creation of debug overlays that render on top of your game. Which is the exact thing I claim to be bad. Using it to make a standalone tool is a bit of a misuse. I encountered several square-peg, round-hole issues.
That said, I have no regrets and would gladly use ImGui again in the future. Omar Cornut has a Patreon for supporting the project. His effort is worth supporting.
Project Generation
I like it when open source code is easily to compile and tinker with. This project includes several sets of project files. Compiling on Windows is as easy as opening the Visual Studio solution file and clicking build. Mac and Linux have gmake files.
For generating these projects I used GENie by Branimir Karadžić. It’s a fork of Premake 4. It uses a lua file to define project settings for Visual Studio, gmake, XCode, etc.
Here’s a snippet of my genie.lua file showing the configuration for the Flatbuffers project.
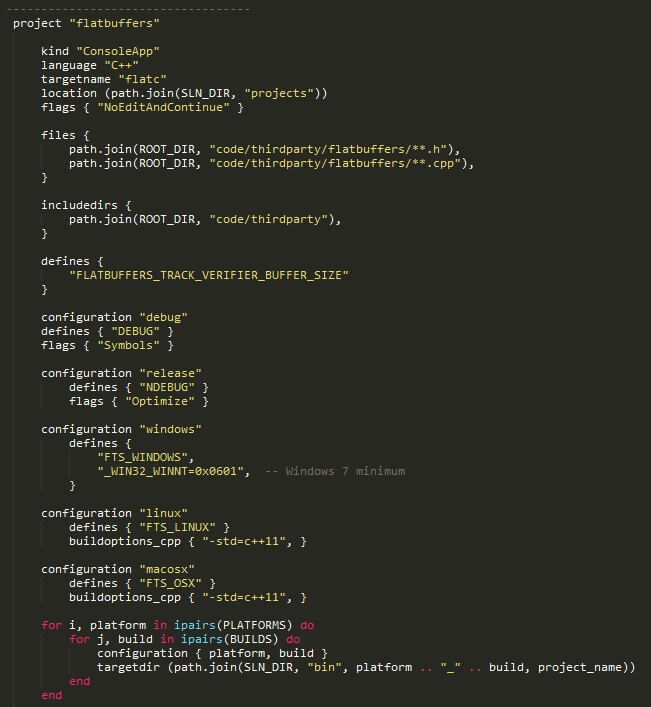
Despite looking like data this is Lua script code. It confused me at first as well. In Lua you can exclude parenthesis on function calls if you’re passing in either a string or a table constructor.
Project, targetdir, flags, files, configuration, etc are all functions. Those functions are being called and with either a single string or a table as an argument.
function MyPrint(string_to_print)
    print(string_to_print)
end

-- The following four lines produce the same output
print "hello world"
print("hello world")
MyPrint("hello world")
MyPrint "hello world"
I am super, super happy with GENie. I’ve spent a lot of time over the years building and maintaining project files. It’s error prone work. I don’t see any reason to do that ever again.
I did encounter several issues that took time to figure out. For example, files aren’t concatenated per-platform like other settings such as defines or flags. Instead you have to include all files for all platforms then exclude files as needed per platform.
Continuous Integration
Open source GitHub projects have some pretty great options for continuous integration (CI).
Travis CI
Travis CI provides CI for Mac and Linux. For open source projects it’s free. Integration with GitHub couldn’t be easier.
Getting Travis to compile my project on Linux was a huge pain in the ass. Even with a working Linux build it took several frustration filled evenings to get Travis compiling. Travis doesn’t share the exact image they use, iteration time is slow, and documentation is both limited and wrong. Support takes over a week to respond to bug reports.
Part of my process is to upload compiled binaries to S3. Doing so requires encrypting my private key. Which requires installing Ruby and downloading a Travis gem. I despise when platforms make me install gigantic frameworks just to do one tiny little thing. It’s a major pet peeve.
But Travis is free and works so I shouldn’t complain too much.
Appveyor
Appveyor is Travis but for Windows. It’s free for open source and seamlessly integrates with GitHub.
Appveyor gets huge bonus points for quickly responding to support e-mails. Not only did they respond quickly and helpfully. They even issued a pull request with the fix. Thanks Ilya!
For double bonus points their web interface provides a tool for encrypting keys. No Ruby required!
Based on my experience with Travis and Appveyor I’m not a huge fan of either’s YAML config. It’s ok for basic stuff. As soon as you step off the beaten path you have to take three steps back and do it manually. Many features feel tacked on, incomplete, and buggy.
I feel like I’d almost rather script commands directly. The YAML is too much of a black box. Build systems are hard and complicated.
Virtual Machine
I only ported to Linux after completing the Windows version. I initially relied on Travis. That was a terrible idea. Iteration time is way too slow to track down countless dependencies. At home I only have a Windows laptop so I decided to setup a Linux VM.
VirtualBox
It’s probably my environment, but for me VirtualBox is unusable.
I use a 14" laptop with a 3200 x 1800 screen. For development I use a single 1080p external monitor. If you know anything about Windows you know it still sucks for high DPI displays.
Suffice to say, VirtualBox doesn’t handle scaling well. I literally can’t click some buttons. Not that it matters. VirtualBox is too slow and laggy to be worth using. I’d rather dual boot.
VMWare Workstation Player
VM Player is smooth, fast, and crisp. Everything I need and everything VirtualBox isn’t.
Because Travis uses Ubuntu 12.04 that’s what I installed. Although I tested with the desktop version instead of server.
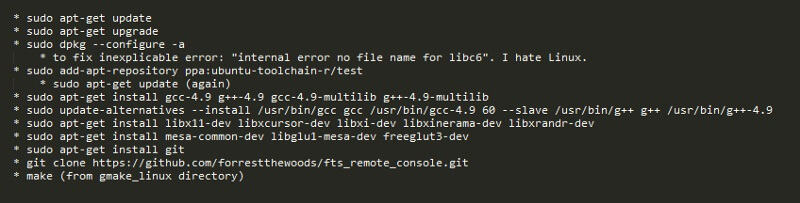
Getting my VM to compile took more hours than I’ll admit, multiple fixes found via StackOverflow, and lord knows how many builds. I encountered several errors unique to Ubuntu 12.04. Here’s my final set of terminal commands to compile from a clean VM.
To my great displeasure on Linux can only compile either 32-bit or 64-bit binaries at a time. Several dependencies can only be installed as either 32-bit or 64-bit. You can’t have both installed at the same time. On Windows one Visual Studio solution can compile every permutation with a single click. Grumble grumble!
After my VM compiled there was a whole slew of new issues to get Travis to build. Travis’s setup is weird such that environment variables are blown out. Getting Travis to download and use a newer compiler with C++11 support was very frustrating.
Once Travis compiled for Linux I was able to get Mac builds working without access to a Mac. Be warned, Travis often has very long queues for Mac. Sometimes over an hour.
Uploading my Mac binary to S3 does require an extra step. You can’t download a .app from S3 because a .app is just a folder. I zip the binaries for distribution and it works fine.
Source Control
I’m weird and use Perforce for side projects. They offer a free version in the cloud that supports 2 projects, 5 GB storage, and 5 users. I save GitHub for “finished” projects.
As I’m a game developer I use Perforce for work. Getting my personal depot and work depot to peacefully co-exist on my home machine was new to me. I put a .p4config file in each workspace root which sets p4user, p4client, p4ignore, and p4port environment variables for that directory tree. This let’s one machine play nicely with two different depots.
Third-party Libraries
I setup a workflow for embedding, modifying, and updating the open source libraries I used.
- Add Flatbuffers, ImGui, etc to
//depot/thirdparty. - Create a branch spec to branch source code only from
//depot/thirdpartyto//depot/fts_remote_console/code/thirdparty. - Modify library as desired.
- Drop library updates into
//depot/thirdparty. (Nuke old version first.) - Integrate using branchspec. Resolve conflicts if necessary.
This workflow is roughly equivalent to Git submodules. Except it’s easy and works. Zing!
I’m a fan of nesting dependencies. Yes, it means thirdparty libraries need to be manually updated. It also means that builds are reproducible. Let us never forget the tyranny of left-pad.
Future Work
There are a few issues I‘d like to see resolved. I may or may not ever get to them. New side projects are calling my name.
- OS X build has warnings.
- Linux build needlessly rebuilds due to flatbuffers re-generating code.
- Visual Studio needs to mark protocol.fbs as “Custom Build Tool” instead of “Does not participate in build”.
- Create a working FASTBuild project file.
- Create a working Ninja project file.
- Improve ImGui high-dpi rendering.
- HTML/JS based console (new feature).
I’ve created these issues on GitHub. If you know how to fix any of them I’d love if you took a moment to comment on GitHub.
Conclusion
This was a fun little project. It was opportunity for me to learn a few new things. If you made it this far then hopefully you learned a few things as well. Thanks for reading.